
Build training around the material your team already uses: documents, product recordings, videos, repositories, and shared knowledge. Combine sources with a clear brief so the authoring assistant can teach the right workflow and use your terminology.
For format-specific instructions, follow Turn documents and recordings into a course. For a connected library, start with Google Drive, OneDrive, or SharePoint, Notion or Confluence, Document360, or Granola.
The Knowledge Base example below uses the fictional Customer onboarding checklist from the demonstration workspace.
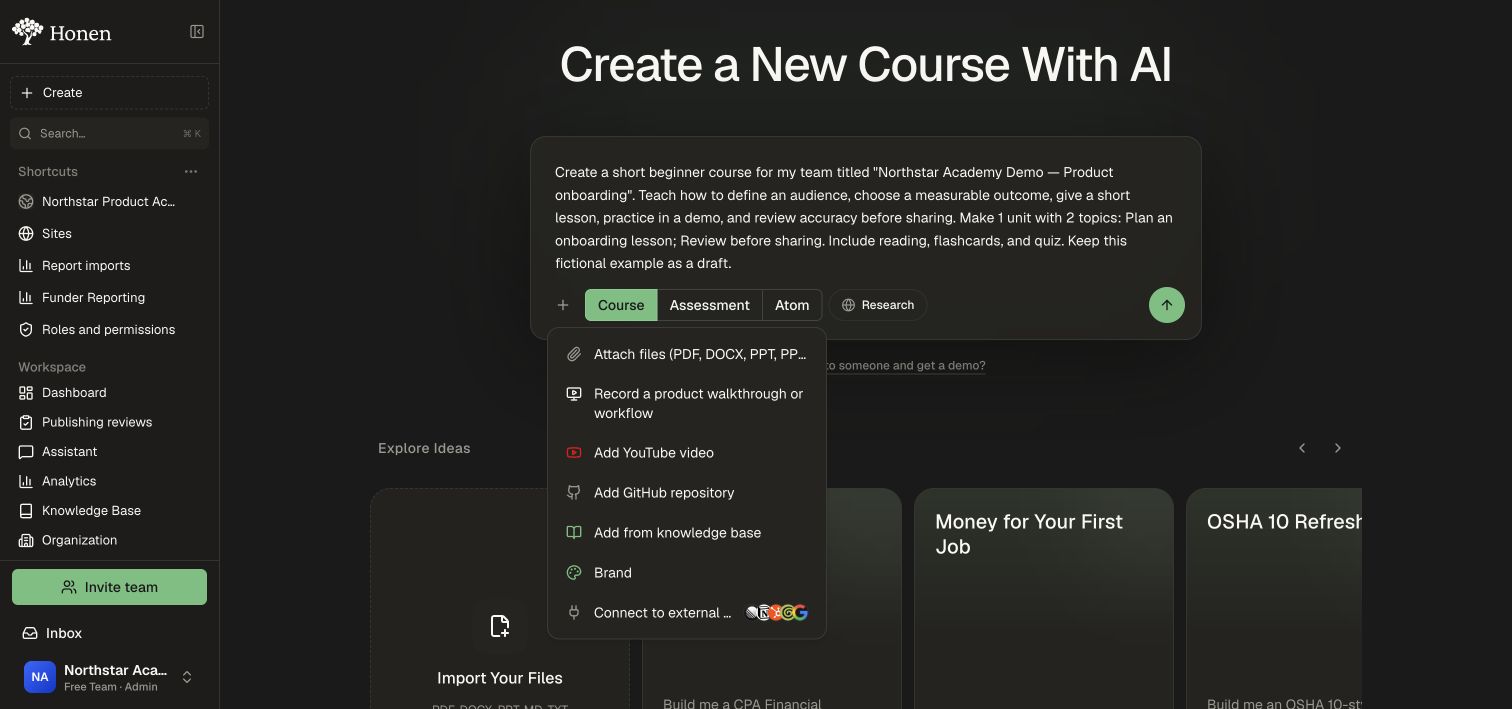
1. Choose where to add a source
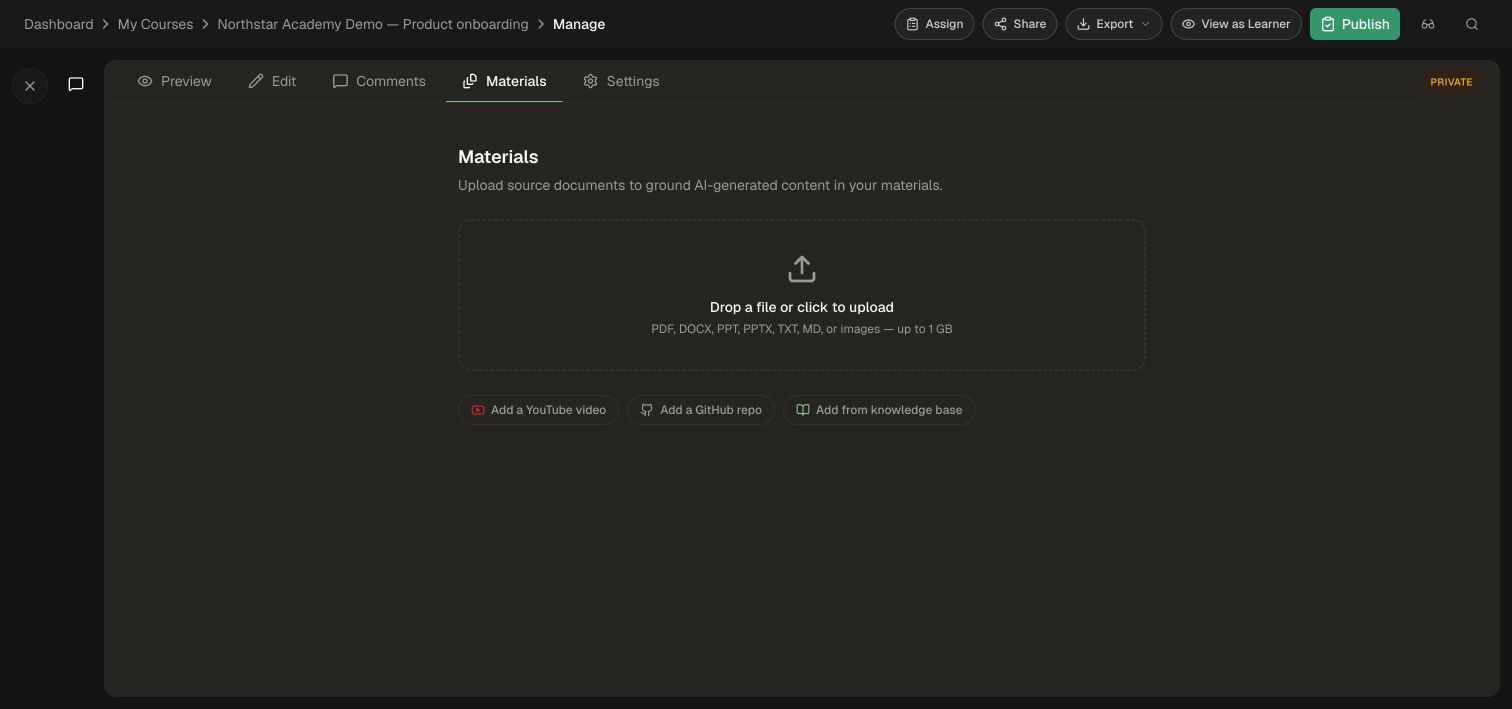
For a new course, open Create → Attach before submitting the brief. For an existing course, open its editor and select Materials.
The existing-course Materials screen supports file upload, Add a YouTube video, Add a GitHub repo, and Add from knowledge base.
2. Upload a document from your computer
- On the creation screen, open Attach and choose the file upload option. In an existing course, open Materials and use its file upload area.
- Select the document in your computer's file picker. Common sources include PDF, DOCX, PPT/PPTX, Markdown, text, images, and video. The upload limit is 1 GB per file.
- On Create, wait for uploading and processing to finish; a ready file chip shows a checkmark. In an existing course's Materials, review the staged files and choose Start Processing. To build a new unit, enable Create unit from these materials, choose the topic count and activity types, then use Start Processing & Generate Unit.
- Describe how Honen should use the material: the audience, learning outcome, and which parts matter. Submit the creation prompt only when the attachments are ready.
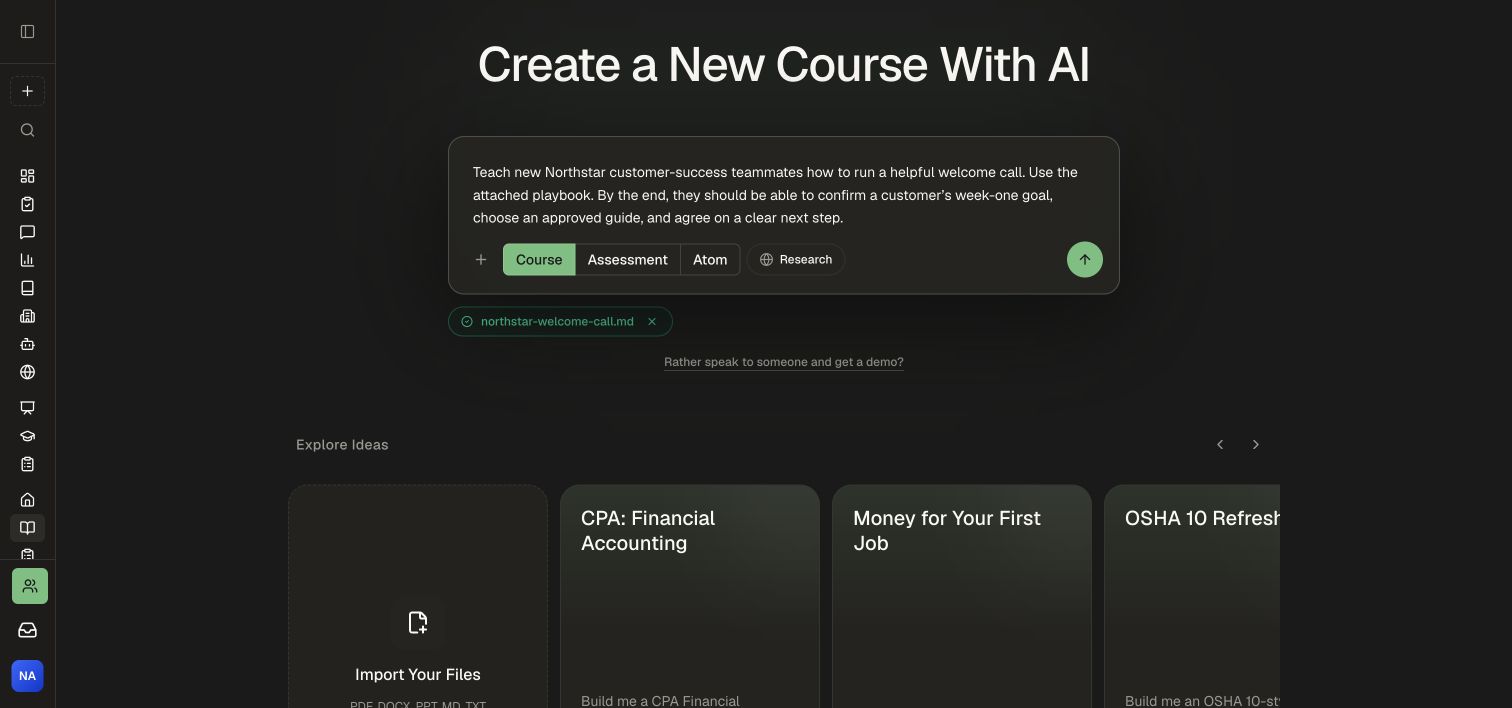
For an existing course, wait for the material to become ready, then ask the editor assistant to use it for a particular change.
3. Attach a Knowledge Base document
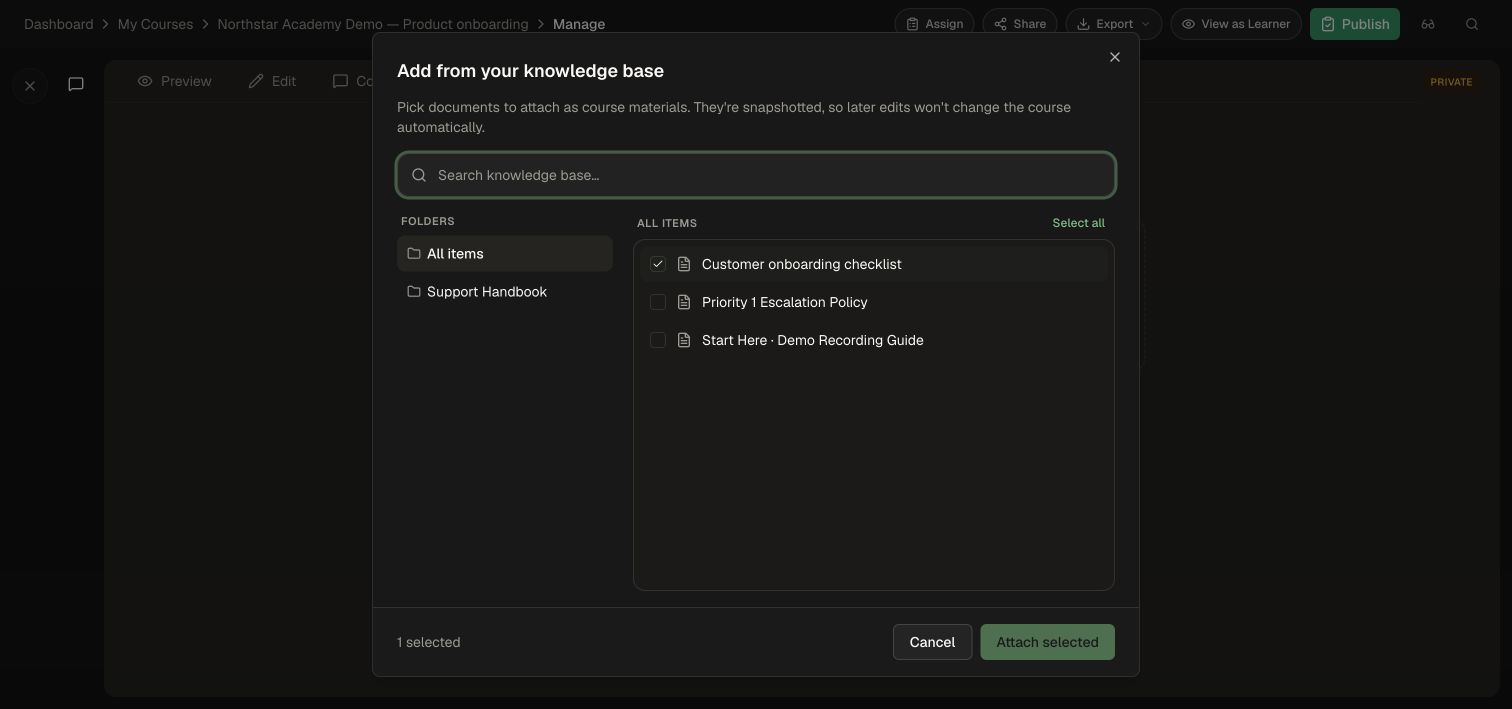
- Select Add from knowledge base.
- Browse a folder or search the loaded items.
- Check the document you want to use. Select the checkbox rather than merely opening the document preview.
- Confirm the selected count at the bottom.
- Select Attach selected in the existing-course Materials screen, or Add selected on Create, and wait for it to finish.
4. Check the attachment
- Confirm that the Materials count increases.
- Find the document card marked From KB.
- Open its preview and verify the correct content was attached.
- Ask the editor assistant to use that document for the specific lesson or revision you want to build.
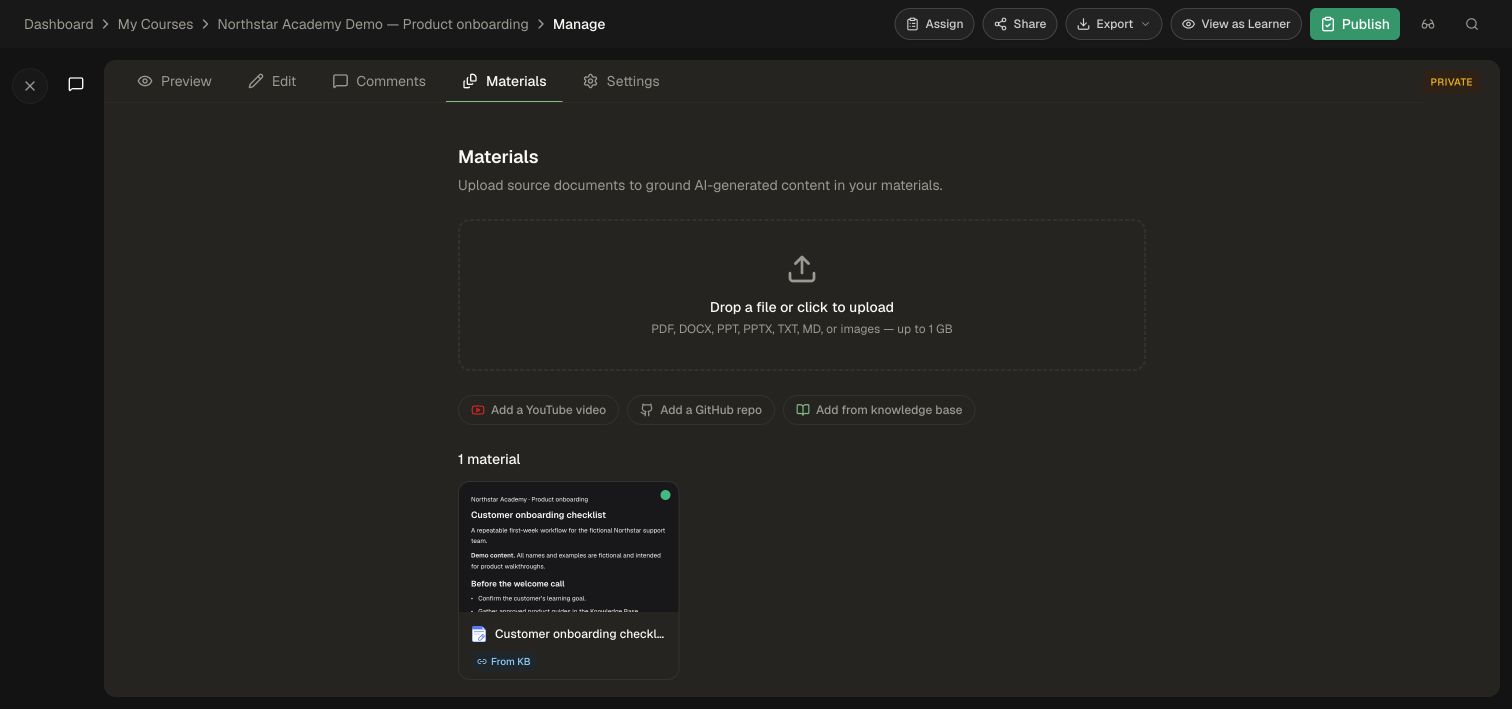
The picker creates a snapshot connected to the Knowledge Base source. When that source changes, refresh the material and review the affected lessons using Build and maintain source-backed learning.
Add a YouTube video
Turn a public video’s transcript into source material for a lesson, course, or assessment.
- On Create, open Attach → Add YouTube video. In an existing course, open Materials → Add a YouTube video.
- Paste the public video link into Video URL.
- Select Add video.
- Wait for the video material to finish processing. On Create, its attachment chip shows a checkmark when ready.
- Describe the audience and what learners should take away from the video, then submit the brief. For an existing course, ask the editor assistant to use the video for the lesson you want to change.
Record a product walkthrough
Capture the steps your learners need to perform, then use that recording as source material for a lesson or interactive walkthrough.
- On Create, open Attach → Record a product walkthrough or workflow.
- Select Record your screen.
- In your browser’s chooser, select the tab, window, or screen to record and select Share. Allow microphone access if you want to narrate the steps.
- Perform the workflow in order. Explain the goal, the choices you make, and how to recognize the finished result.
- Return to the recorder and select Stop.
- Play the preview. Select Use recording to keep it, or Re-record to start again.
- Wait for the recording to upload and finish processing. Add a brief explaining whether you want a lesson, a demonstration, or an interactive walkthrough, and submit it.
The saved recording appears as a course material. For an interactive walkthrough, continue with Create and edit projects.
Add a public GitHub repository
Use a repository’s code and documentation as reference material for technical onboarding or product training.
- On Create, choose Attach → Add GitHub repository. In Materials, choose Add a GitHub repo.
- Paste a public repository link, such as
https://github.com/owner/repository, into Repository URL. - Select Add repository and wait for processing to finish.
- Describe the parts of the repository learners need to understand and the task they should be able to perform.
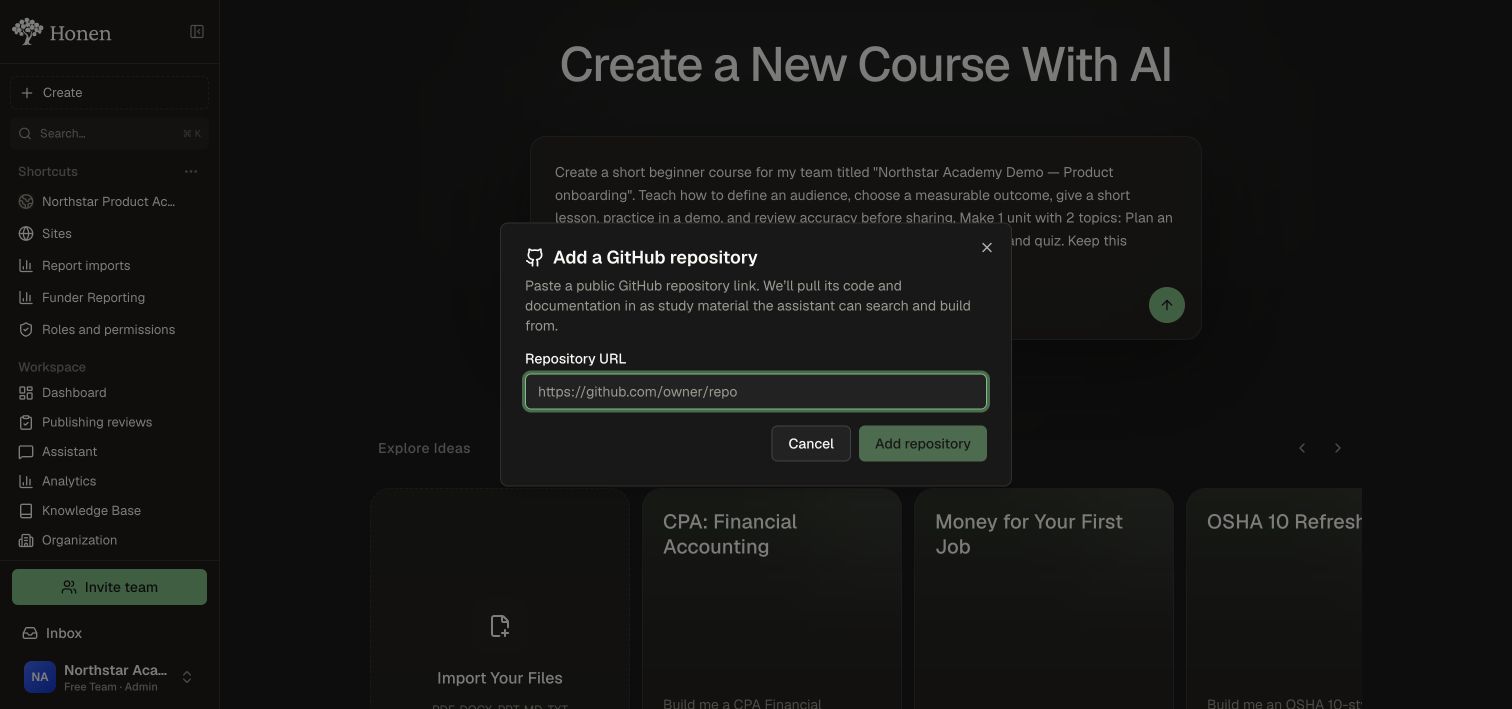
For ongoing updates from a private or public repository, use GitHub sync in the Knowledge Base, then attach the relevant documents to your course.
Use a connected external tool
Give the assistant access to tools you already use so it can find the relevant information while helping create your course.
- On Create, open Attach → Connect to external sources (MCP). If you already have connections, open Connections → Manage connections or Add connection.
- Find your provider and select Connect. Providers that need assisted setup show Contact sales.
- Complete the provider’s sign-in and authorization window, then return to Honen.
- Check that the connection is marked Connected. Under Attach → Connections, turn on the connection you want the assistant to use.
- In your brief, name the connected source and the information you want used, such as a particular project, document, or customer workflow.
Connected tools become available to the assistant. You can manage them from the same Connections menu. See Integrations and MCP for connection settings and custom servers.
If Granola is connected as a content source, Attach → Add from Granola opens a meeting picker. Select the meetings, choose whether to include notes, transcripts, or both, and select Add selected to import them as course materials.
Set the course’s visual brand
Use Brand to give newly generated course images a consistent style, palette, and logo reference.
- On Create, open Attach → Brand.
- Choose a Style: Editorial Doodle, Professional, Playful, or Custom. If a workspace preset is offered, select Apply to use it.
- Optionally enter a Name and select Add logo, or drag in a PNG, JPEG, or WebP image under 2 MB.
- Set the Primary, Accent, Canvas, and Ink colors you want to customize.
- Add Guidelines for the visual style. Custom guidelines replace the default style; guidelines for the other presets build on that style.
- Select Save, then continue writing your course brief. The logo uploads when you save.
When the workspace enforces its brand, Honen uses that shared brand and hides the per-course Brand choice. You can also manage an existing course’s brand in Course settings; updated branding applies to future image generation.
For a course that teaches your brand itself, attach the brand guide as source material and describe the behaviors or standards learners should practice.
Get your materials ready
Choose the workspace and folder containing your source, select the document checkbox, and use Attach selected or Add selected to confirm. For YouTube, enter the complete video URL to enable Add video.
Screen recording appears in browsers that support screen capture. For external connections, allow the provider’s sign-in pop-up and use Reconnect if the connection needs attention.
After adding new material to an existing course, ask the editor assistant for the changes you want and review the updated lessons.
Continue with your sources
- Create your first course: brief, setup questions, outline approval, and post-build review.
- Organize and use source material: prepare the shared workspace library.
- Import files and links: add reusable source documents to that library.
- Sync documentation from GitHub: keep a repository folder synced to the Knowledge Base.
- Edit and review a course: inspect and revise content after adding a source.